What Is Marble Grinding and How Is It Done? A Guide for Your Home's Floor
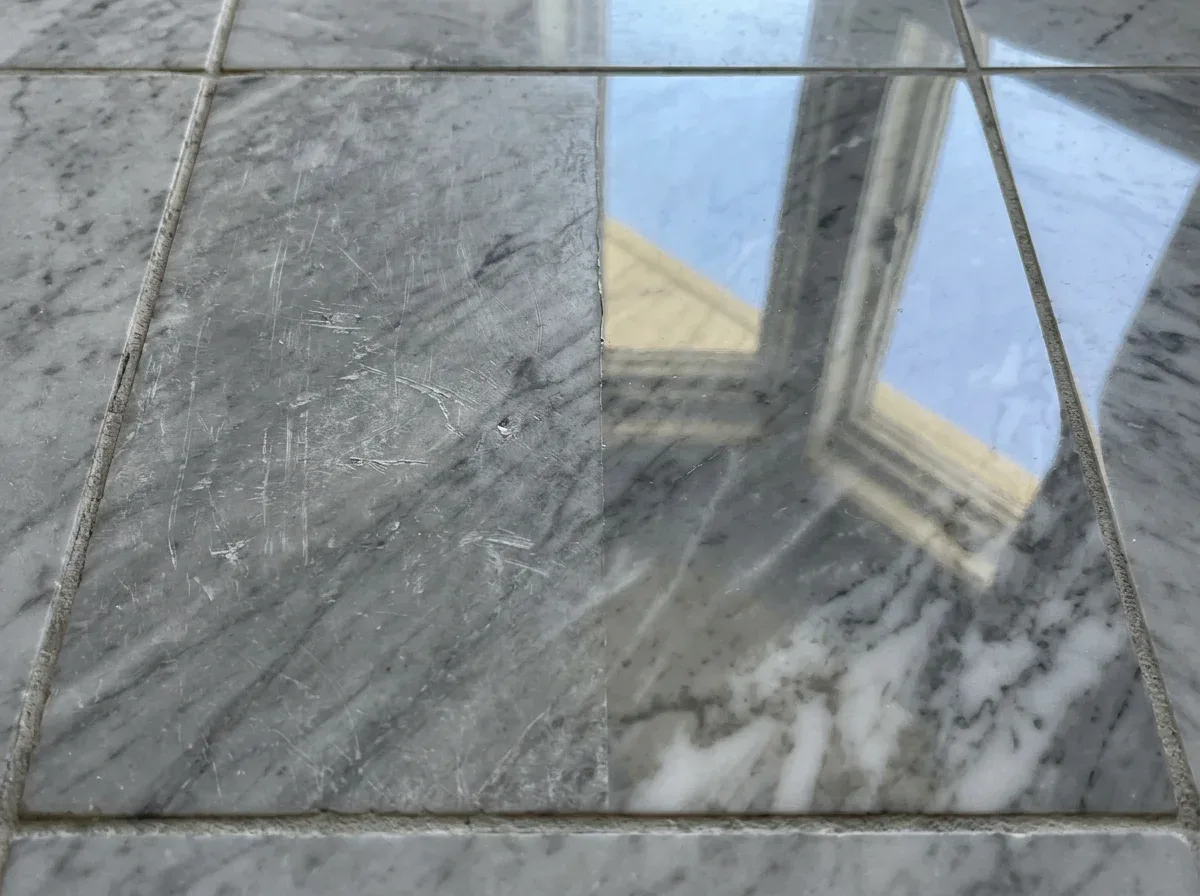
Your marble floor no longer shines like it used to; there's a dull trail along the walkways, your foot catches where the slabs meet, or a cloudy ring is left where lemon was spilled. The first question that comes to mind is: can this floor be fixed with grinding, or does it need to be replaced? In most cases, the answer is grinding. We wrote this article not as a technical manual, but around the questions of someone thinking about renewing their home's flooring: Do I really need grinding, what exactly does grinding do, what will happen at home that day, how long does it take, and what should I check when it's done?
In short: Marble grinding is the process of removing a thin layer from the surface of dulled and scratched marble step by step with diamond abrasives, followed by polishing. It eliminates scratches, dull marks and the height difference between slabs; because it is done wet, it doesn't spread dust and can be carried out while you are living in the home.
First, a Simple Question: Does Your Floor Need Grinding?
Not every dull marble floor needs grinding. Sometimes the problem is a film of detergent built up on the surface, and sometimes it's limescale or an old layer of polish. In such cases, a proper deep clean or polish removal can make a big difference. Ask yourself these questions:
- Can you feel scratches when you touch the surface with your finger? Scratches your fingernail catches on won't go away without removing material from the surface.
- Does your foot catch where the slabs meet? This height difference (lippage) can only be corrected by grinding.
- Are the dull marks where things were spilled? Lemon, vinegar or limescale remover marks can be removed by polishing if they are light, and by grinding if they are deep.
- Is the whole floor dull, or only the walkway? If only the hallway and the areas in front of doors are dull, the wear comes from sand and foot traffic.
If you answer "yes" to any of these questions, grinding is most likely the right solution. If you're not sure, the best approach is to have the floor seen on site; during the inspection, looking at it against the light and a small test area often give the answer.
What Does Grinding Do, and What Doesn't It Do?
Grinding removes the damaged layer on the surface and reveals the sound stone underneath. In doing so, it:
- Removes scratches, dull areas and light acid marks.
- Eliminates the height difference between slabs, making the floor look like a single piece.
- Brings back out the stone's natural color and veining.
But grinding has its limits too. Knowing them from the start helps you set the right expectations:
- Deep stains that have penetrated the stone (rust, oil) may not always come out completely; sometimes a poultice treatment is needed.
- Broken, cracked and hollow (drummy) slabs must be repaired before grinding.
- Extra care is needed with very thin slabs or those that have been ground many times.
| Problem | Can grinding fix it? | Additional treatment |
|---|---|---|
| Dullness on the walkway | Yes | Not required |
| Scratches that catch on a fingernail | Yes, starting with a coarse grit | Not required |
| Height difference between slabs | Yes | Regrouting if necessary |
| Acid marks (lemon, vinegar) | Yes | If light, polishing alone may be enough |
| Rust and oil stains | Partially | Poultice application |
| Broken or cracked slab | No, repair first | Color-matched filling or slab replacement |
| Hollow (drummy) slab | No, stabilization first | Injection or re-setting |
Grinding Day: What Will Happen in Your Home?
For those having their floors ground at home for the first time, the practical side of the process is what they wonder about most. The work generally proceeds in this order:

Coarse grinding
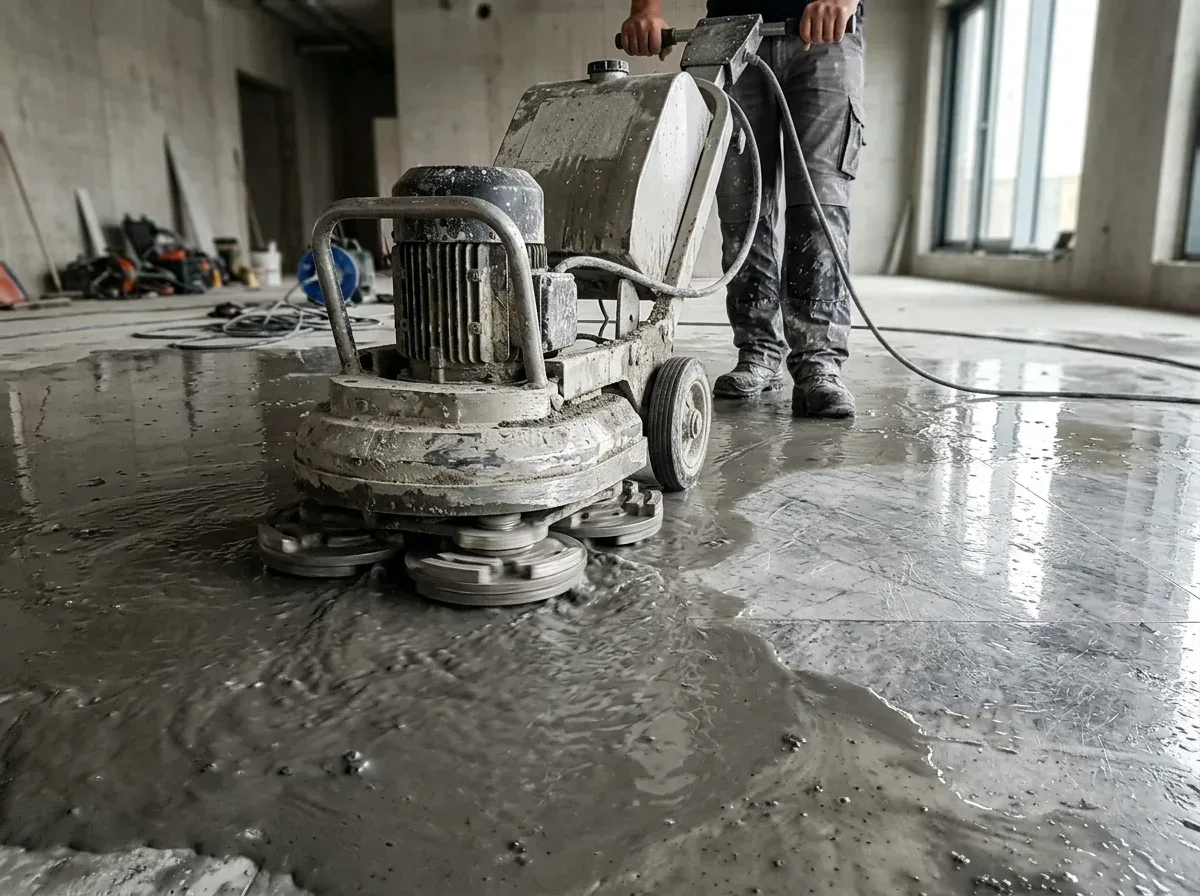
The damaged top layer of the surface is removed with a heavy grinding machine and metal-bonded diamond abrasives, and height differences are eliminated. This is the stage with the most noise and slurry. The grit level to start with is chosen according to the depth of the deepest scratch.
Fine grinding
With resin-bonded diamond pads, the surface becomes a little finer at each step. Each grit removes the lines left by the previous one. If this stage is rushed and a grit is skipped, fine swirl marks will show against the light after polishing.
Polishing and finishing
In the final grits, the surface begins to reflect light. If desired, the shine is enhanced with crystallization polish; if a honed (matte) look is wanted, fine grinding is stopped at a certain grit.
Wet grinding produces not dust but a gray slurry, which is continuously collected by vacuum. For this reason, grinding can be done even while you are living in the home; only the room being worked on needs to be empty.
How Long Does It Take?
The duration depends on the floor's square meterage, the type of stone, and the degree of damage. A room that needs only polishing may be finished in a few hours, while a large living room with height differences and repairs may stretch over several days. The time for the filler to harden and the final protective coat to dry should also be added to the schedule.
| Floor condition | Approximate work | Example duration (30–40 m² living room) |
|---|---|---|
| Light dullness, no scratches | Fine grinding and polishing | Half a day – one day |
| Noticeable scratches and acid marks | Grinding starting from a medium grit | One day |
| Lippage, open joints | Full grinding starting from a coarse grit | One – two days |
| Includes repair of cracks and breaks | Repair, waiting period and full grinding | Two – three days |
These durations are examples; an accurate estimate requires measurements and an on-site inspection.
What Should You Check When the Job Is Done?
At handover, you can check the following points yourself:
- Look against the light: Crouch down and look at the floor against the light coming from the window; no circular scratches or swirl marks should be visible.
- Feel the joint levels: Your foot should not catch on the joints between slabs.
- Check the corners and the edges along the walls: The edges should have the same shine as the center of the floor.
- Check the fillings: The color should match and the filling should be level with the surface.
- Check the cleanliness: There should be no slurry residue on the baseboards, under the doors or at the base of cabinets.
Maintaining the Shine After Grinding
For the first two days after grinding, the surface should be kept free from heavy items, rugs and wet cleaning. For daily cleaning, a pH-neutral stone detergent and a well-wrung mop are enough. Placing doormats at entrances, attaching felt pads to furniture legs and avoiding acidic cleaners will extend the life of the shine by years.
In seaside cities like Alanya, sand carried in on shoes is marble's worst enemy. A good doormat at the entrance and regular dry sweeping noticeably extend the interval between grindings.
Wet Polishing: Dust-Free and Controlled

Our teams carry out marble polishing using the wet method. The water binds the abraded stone particles and turns them into slurry, which is continuously collected with a wet vacuum. As a result, no dust spreads through the home, and the work area stays visible at all times.
Before starting work, we tape off the baseboards, door frames and thresholds, protect the electrical outlets, and take precautions to keep water from reaching adjacent rooms. When the job is finished, the floor is rinsed and dried before it is handed over.
The Importance of Not Skipping Grits

The secret of a good polish is working through the grits patiently and in sequence. Each diamond grit removes the fine lines left by the previous one. When a grit is skipped, those lines remain beneath the glossy surface and show up as circular swirl marks when viewed against the light.
That is why, at handover, we inspect the floor together against the light coming from the window, and check the corners and doorways together as well.
Should We Finish It Glossy or Honed?

Not every floor has to be finished to the same level of shine. In calm areas such as living rooms and bedrooms, a polished surface shows off the veining of the stone at its best. In busy or wet areas such as the kitchen entrance, hallway, and bathroom, a honed (silky matte) finish makes scratches and marks less noticeable.
During the site visit, we discuss how each area is used and decide together which section should be finished at which level of shine.
How Is Marble Polishing Done?
After polishing, the cheapest way to protect the floor is a doormat at the entrance. Every day you keep sand from coming inside, you push the next polishing a little further away. — Expert Tip
Frequently Asked Questions About Marble Grinding and Polishing
01Does marble grinding make the floor thinner?
02Can I stay at home during the grinding?
03When can I put the furniture back after grinding?
04Does every marble reach the same shine?
05Are grinding and polishing the same thing?
06How much noise does grinding make?
07How often should marble be ground and polished?
Related Articles
Marble Honing and Polishing Stages: Diamond Pad Grit Levels from Coarse Honing to Polish, Preparing for Marble Honing: Furniture, Dust, and Duration, The First 48 Hours After Honing: What to Watch Out for on Marble Floors, Can Floor Honing Be Done While You Are Living in the Home?, How Often Should Marble Be Honed?